Every Facebook user who posts family or personal pictures to their Facebook Album should consider setting up their Facebook Album Privacy. This would be especially important if you don’t want some of your children’s pictures to be displayed to the entire Facebook community or your Facebook Network. Here are some recommended steps.

Step 2 - Facebook Album Privacy Settings . settings. Here are instructions for doing so.
- Step 1 – Assign each Facebook friend to a Facebook Friends List. From the Facebook main menu, click Friends, All Friends. I then created the following lists: a) Family, b) Close Friends, c) High School, d) College e) Family f) Business. The Limited Profile is automatically created for you. I only had a couple hundred friends but in my case, it took less than 15 minutes. You should note that your friends can belong to more than one list such as College and Close Friend. You should also note that Facebook considers everyone not in your Network a Friend.
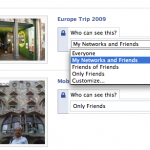
- Step 2 – Go to your Facebook Privacy Photos. From the Facebook Home page, click Profile, then in the left Navigation under Photos, click See All. Under Your Photos, click Album Privacy. You can also go directly to this page by going to: http://www.facebook.com/privacy/?view=photos For each album, you will need to to select Who can see each album. The default settings are: a) Everyone b) My Network and Friends c) Friends of Friends and d) Only Friends.
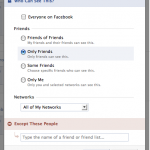
- Sep 3 – For each Album you want to make private, click Edit Custom Settings. Then under Edit Photo Album Privacy, click Some Friends. If you click the + icon, you will see your the lists you created in Step 1 Above: a) Family b) Close Friends c) High School d) College e) Family f) Business. Select one or more for each album or to keep your Album Public, select Everyone, My Network and Friends, Friends of Friends or Only Friends.
- Step 4 – Test Your Settings – You will need a second Facebook account to test your settings. If you have a son or a daughter on Facebook that you have access to, then that would be a good account to use. Also, if you don’t have access to your son or daughter’s Facebook account and they are under age, this would be an excellent time to ask them for access rights. You can also use this opportunity to help them make the Album secure.
- Step 5 – Test Your Wall – From the Facebook main menu, Click Profile and make sure with your test account you correctly test your Wall to see if your privacy photo album correctly displayed. You should also click on the Photos tab and scroll to your list of Albums and see if they are correctly displayed. If you make a Family Album Private for your Family List, the Album name will not be displayed to your other Friends.

Facebook Edit Album Privacy settings - Some Friends
The process of setting your Facebook Albums using this method make take more than a few minutes, but it is well worth the time! You will also be able to keep selected Albums Public which may be important to your business.


